
Ever wonder why boat dealers are so eager to have you bring your outboard motor in for regular service? While professional maintenance is important, there are several money-saving hacks that dealers won’t readily share. These DIY tricks can extend your engine’s life, improve performance, and save you hundreds in unnecessary service costs. As experienced boaters ourselves, we’ve compiled five game-changing outboard motor maintenance hacks that give you dealer-level results without the hefty price tag.
#1: The Vinegar Flush That Dealers Don’t Advertise
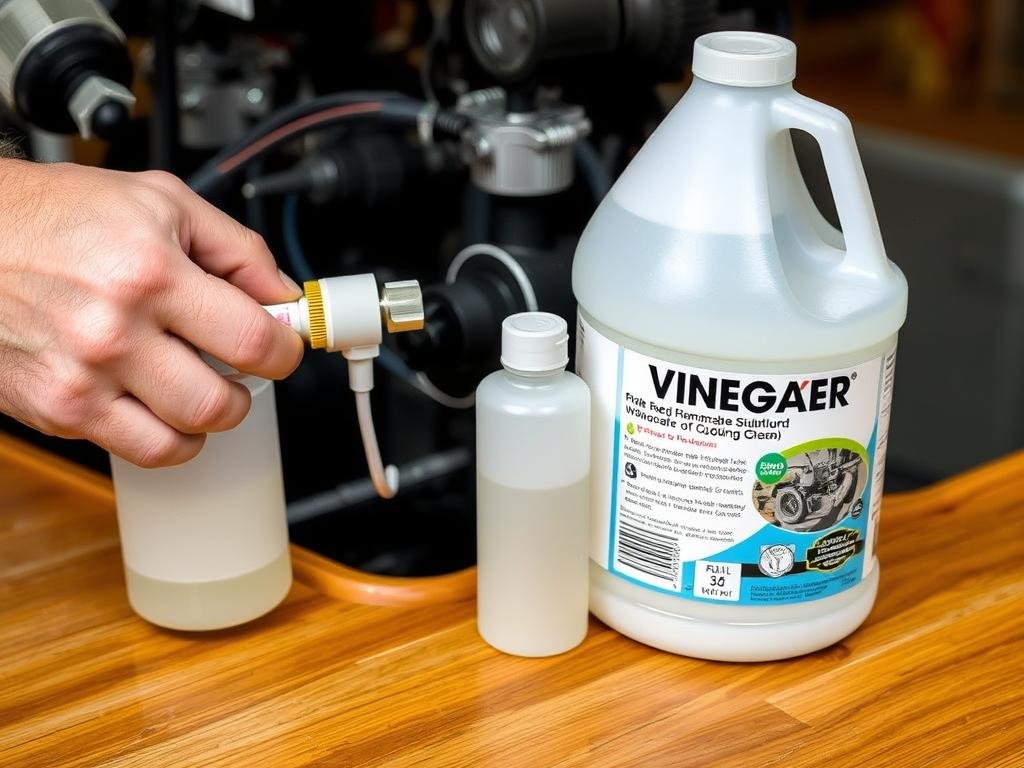
Most boat owners know they should flush their outboard motors after use in saltwater, but dealers rarely mention that commercial flush products often contain the same active ingredient as a simple household item: vinegar. Salt deposits and mineral buildup in your cooling system can cause overheating and expensive damage over time.
Instead of purchasing specialized descaling solutions, create a 50/50 mix of white vinegar and water. Connect this solution to your engine’s flush port using a standard garden hose flush kit. Let it circulate for 10-15 minutes with the engine off (never run your engine with vinegar solution), then flush thoroughly with fresh water.
This simple hack dissolves mineral deposits and salt buildup just as effectively as commercial products costing 5-10 times more. For optimal results, perform this vinegar flush every 3-4 regular freshwater flushes if you operate in saltwater environments.
Safety Note: Always ensure you flush the system thoroughly with fresh water after the vinegar treatment to prevent any acidic residue from remaining in the cooling passages. This hack works best on aluminum and stainless steel components but avoid using on zinc anodes as it may accelerate their deterioration.
For an even more effective flush, consider using the Marine Motion Professional Flush Kit, which creates the perfect seal for either vinegar solutions or commercial products.

#2: The DIY Vacuum Oil Change System
Changing your lower unit oil is essential maintenance that dealers charge premium rates to perform. What they don’t tell you is that you can easily create your own vacuum extraction system for a fraction of the cost of commercial kits.
All you need is clear plastic tubing, a clean plastic bottle, and a hand pump (like a brake bleeder pump). Insert one end of the tubing into the lower unit drain hole after removing the plug. Connect the other end to your bottle and create vacuum pressure with the hand pump. This DIY system pulls old gear oil out cleanly without the mess of traditional draining methods.
This hack not only saves you money on service fees but also allows you to inspect the extracted oil for metal particles or milky appearance—both signs of potential problems. The clear tubing gives you visibility that even some professional systems don’t offer.
Technical Note: Always refill with manufacturer-recommended lower unit oil. The proper oil grade is critical for gear protection. Look for marine-specific gear oils that contain anti-corrosion and extreme pressure additives.
For those who prefer a professional-grade solution, the Marine Motion Gear Oil Service Kit includes everything needed for both extraction and refilling, with precision measurements for perfect fills every time.

#3: The Dielectric Grease Secret for Bulletproof Electrical Systems
Electrical issues account for a significant percentage of outboard failures, yet dealers rarely emphasize preventative maintenance for electrical systems. The secret weapon against corrosion and moisture intrusion is dielectric grease—an inexpensive product that can save you thousands in electrical repairs.
Apply a small amount of dielectric grease to all electrical connections, including spark plug boots, ignition coil connections, battery terminals, and control module plugs. This creates a waterproof seal that prevents corrosion while still allowing electrical conductivity.
For maximum protection, remove each connection one at a time, clean with electrical contact cleaner, allow to dry completely, then apply a thin layer of dielectric grease before reconnecting. This simple hack dramatically extends the life of electrical components that are constantly exposed to moisture and salt spray.
Technical Note: Contrary to common misconception, dielectric grease doesn’t interfere with electrical connections when properly applied. It actually improves conductivity by preventing oxidation at contact points. Just avoid excessive application that might create physical barriers between connectors.
For complete electrical system protection, pair this hack with the Marine Motion Electrical Protection Kit, which includes marine-grade dielectric grease and specialized tools for accessing tight connection points.

#4: The Homemade Fuel Stabilizer Formula
Fuel system issues are among the most common and expensive outboard motor problems. Commercial fuel stabilizers work well but come with a hefty price tag. What dealers don’t mention is that you can create an effective homemade fuel stabilizer for a fraction of the cost.
Mix one ounce of pure synthetic oil (like 2-stroke engine oil) with 16 ounces of isopropyl alcohol (91% or higher). Add this mixture to your fuel tank at a ratio of 1 ounce per 2.5 gallons of fuel. The synthetic oil coats fuel system components while the alcohol absorbs moisture—the two primary functions of commercial stabilizers.
This DIY solution is particularly effective for seasonal storage or when your boat will sit unused for more than two weeks. It prevents ethanol fuel from absorbing moisture and forming phase separation, which can cause serious engine damage.
Safety Note: This homemade solution works well for most recreational applications, but for high-performance engines or boats with warranties, consider using manufacturer-approved commercial stabilizers to avoid any warranty issues.
For guaranteed results with no mixing required, the Marine Motion Premium Fuel Stabilizer offers professional-grade protection with specialized ethanol-fighting additives not available in DIY formulas.

#5: The Petroleum Jelly Trick for Water Pump Longevity
Water pump failures can leave you stranded and facing expensive repairs. Dealers recommend complete water pump replacement every 200-300 hours, but they rarely share this simple hack that can extend pump life significantly.
Before installing a new water pump impeller, coat it lightly with petroleum jelly (Vaseline). This provides initial lubrication until water can reach the impeller during startup. The petroleum jelly prevents dry-running damage that often occurs during the first few seconds of operation with a new impeller.
For existing water pumps, you can perform preventative maintenance by removing the lower unit, applying petroleum jelly to the visible portions of the impeller, and reassembling. This simple trick helps prevent the rubber impeller vanes from drying out during storage periods.
Technical Note: Petroleum jelly is water-soluble and won’t harm marine environments. It provides temporary lubrication only during startup and is quickly flushed away during normal operation. This is particularly important for outboards that sit unused for extended periods.
For complete water pump maintenance, combine this hack with the Marine Motion Water Pump Service Kit, which includes everything needed for a full rebuild, including marine-grade lubricants specifically formulated for water pump applications.

Keep Your Outboard Running Like New
These five outboard motor maintenance hacks can save you hundreds in service costs while extending the life of your engine. By implementing these dealer secrets, you’ll not only save money but also gain valuable knowledge about your outboard’s systems and how to keep them running optimally.
Remember that while these DIY approaches are effective, they complement rather than replace manufacturer-recommended maintenance schedules. Use these hacks alongside regular service intervals for the best results and longest engine life.
For all the specialized tools and supplies mentioned in this guide, visit Marine Motion Outboards. Our team of boating enthusiasts is always available to answer your maintenance questions and help you find the right products for your specific outboard model.
Frequently Asked Questions
How often should I flush my outboard motor?
For saltwater use, flush your outboard motor after every outing. For freshwater use, flushing every 3-5 outings is typically sufficient. However, if you operate in particularly muddy or silty conditions, flush after each use regardless of water type. Using the vinegar solution mentioned in Hack #1 every 3-4 regular flushes will help remove mineral buildup that regular freshwater flushing can’t address.
Can I use vinegar instead of a commercial flush kit?
Yes, white vinegar diluted 50/50 with water is an effective alternative to commercial descaling products for flushing your outboard’s cooling system. The acetic acid in vinegar dissolves mineral deposits and salt buildup similarly to commercial products. However, you should still use a proper flush attachment to connect the solution to your engine. Never run the engine while flushing with vinegar, and always follow with a thorough freshwater flush.
How do I protect my outboard in winter?
Proper winter storage includes: 1) Running the engine with fuel stabilizer, then disconnecting the fuel line and letting it run until it stops (to empty the carburetor), 2) Changing the lower unit oil, 3) Fogging the cylinders with storage oil through the spark plug holes, 4) Applying dielectric grease to all electrical connections, 5) Lubricating all grease points, 6) Storing in a vertical position or on the starboard side (never on the port side), and 7) Using a quality cover to protect from dust and moisture. The petroleum jelly trick (Hack #5) is also excellent for preventing water pump impeller deterioration during storage.
What fuel stabilizer is best for outboard engines?
The best commercial fuel stabilizers for outboard engines contain ethanol treatment additives that prevent phase separation. For most recreational users, the homemade stabilizer in Hack #4 works effectively for short-term storage (2-4 months). For longer storage or high-performance engines, Marine Motion Premium Fuel Stabilizer offers superior protection with specialized corrosion inhibitors and ethanol treatments. Whatever product you choose, the key is using the correct amount and running the engine for 10-15 minutes after adding to ensure it reaches all fuel system components.
How can I tell if my lower unit oil needs changing?
While manufacturers typically recommend changing lower unit oil every 100 hours or annually, you should check it more frequently. Remove the upper vent plug (not the drain plug) and use a clean zip tie or similar tool to reach inside. If the oil appears milky or has a coffee-with-cream color, water has entered the lower unit and immediate service is required. Similarly, if you see metal particles or the oil smells burnt, change it immediately. The DIY vacuum method in Hack #2 makes checking and changing lower unit oil quick and easy.
Essential Maintenance Tools Every Boater Needs
Take your outboard maintenance to the next level with these professional-grade tools that pay for themselves after just one use.

Outboard Engine Flushing Kit
This universal flushing system works with all major outboard brands. Features quick-connect fittings and salt-resistant components for years of reliable use. Includes adapters for both modern and vintage engines.

Corrosion-Resistant Fuel Tank
Engineered with advanced polymers that resist ethanol damage. Built-in fuel gauge and pressure relief system prevent vapor lock issues. UV-resistant exterior prevents degradation even in direct sunlight.

Heavy-Duty Outboard Motor Cover
Marine-grade fabric with UV and mildew resistance protects your investment between uses. Reinforced seams and ventilation prevent moisture buildup. Custom fit options available for all major outboard brands and sizes.
Professional-Grade Tools for DIY Maintenance
Save hundreds on dealer service with these specialized tools designed for home mechanics.

Stainless Steel Propeller Wrench Kit
Marine-grade stainless steel construction prevents rust and ensures perfect fit. Universal design works with all major outboard brands. Includes specialized tools for removing stubborn props without damage.

Premium Fuel Stabilizer Additives
Specialized formula fights ethanol damage and prevents phase separation. One bottle treats up to 100 gallons of fuel. Keeps fuel fresh for up to 24 months during storage while protecting fuel system components.

Digital Compression Tester Kit
Professional-grade diagnostic tool lets you check engine health in minutes. Digital display provides precise readings. Includes adapters for all common outboard spark plug sizes and comprehensive testing guide.
Complete Outboard Maintenance Package
Everything you need for a full season of worry-free boating in one convenient kit.

Complete Outboard Maintenance Kit
This all-in-one kit contains everything needed for annual maintenance: oil filters, spark plugs, gear oil, fuel stabilizer, and specialized tools. Available for all major outboard brands and sizes. Includes detailed maintenance guide with step-by-step instructions.

Professional Diagnostic Tool Kit
Identify problems before they become expensive repairs with this dealer-grade diagnostic system. Compatible with all electronic outboards manufactured after 2010. Connects to your smartphone or tablet for easy operation.

Annual Maintenance Subscription
Receive perfectly timed maintenance supplies delivered to your door each quarter. Customized for your specific outboard model and usage patterns. Includes seasonal additives and components based on your local boating conditions.